Choosing The Best CCTV For Corridors
December 28, 2019
9 Reasons To Install CCTV In Your Home
December 28, 20196 Basic Steps to Follow on CCTV Installation

CCTV Installation can sometimes be difficult and complicated though you can either hire a professional to help you or just do it by yourself. Having in mind that people have different kits and applications, with these simple and easy to follow basic CCTV installation guide, it will guide you through the confusing steps while connecting up your wiring.
It’s essential to note that, if your IP address has POE (power over Ethernet) then there is no need to supply power to your cameras. However, for those having analogue and HD-SDO system, it’s necessary to have a power supply for all your cameras
Here are the basic 6 easy step to follow when installing a CCTV;
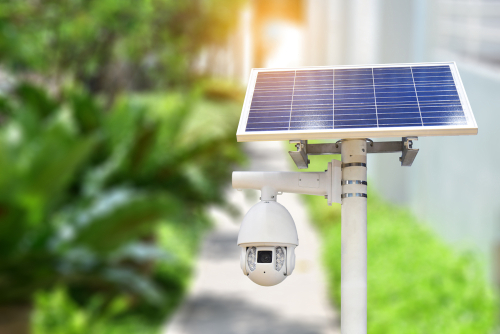
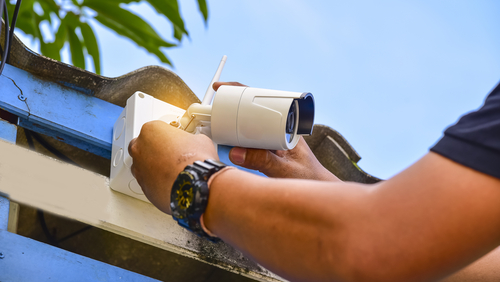
Step 1: Choose camera location
First, consider the required field of view but avoid pointing your CCTV cameras directly to sources of light such as bright doorways, lightings and windows. Too much light affects the quality of image though sufficient lighting is essential. Therefore, right spots for your cameras and DVR is the most essential aspect when it comes to installing a CCTV camera-system. it help maximize your camera coverage as it also minimize cable length.
Things to consider;
– For indoors CCTV installation, the most suitable place is a corner in the room in which most entry points into your rooms are visible.
– For outdoors, a higher spot that’s covering the door and windows approaches are the most suitable location.
– Power sockets should be in close proximity.
– Each chosen spots should be above 10ft to avoid being knocked down easily.
Step 2: Run Cables
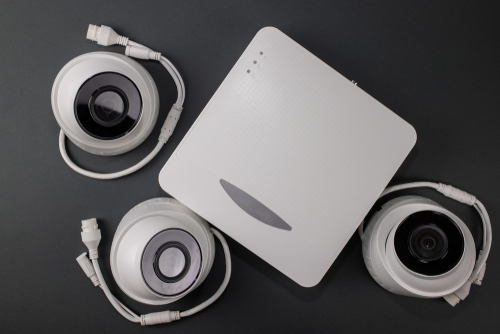
Make sure that in each camera location, you have run one of the supplied pre-terminated cables that is, between the location of the camera and the control equipment (DVR) location.
Things to consider;
– The male power plug should be located at the camera side.
– The power-socket should be located at the control equipment side.
– Thereafter, for each camera’s video-out socket, connect them to a video-input socket that is on the DVR through the black BNC lead on the supplied cables.
To manage your cables;
– You should plan a pathway for all your cables starting from the cameras to the DVR unit.
– To keep your wire or cables safe and well managed, use wire moldings.
– You should nail the moldings just along the path. In addition, put the Siamese surveillance-wire inside to help manage the cables.
Step 3: Power Cameras
It is essential to know that both the DVR as well as the cameras are all powered by a single power supply. Therefore, for each CCTV camera’s power-input, connect them to the 4/5/8 way power supply-splitter lead on your power supply using the same cable.
Things to consider;
– A camera unit should be placed at the desired place.
– When mounting your cameras; a guide marks should be made for drilling purposes. Drill holes as well as hammer-in the screw moldings to help place your camera firmly.
– For the camera to work, you’ll have to insert the camera’s power cable in a socket.
Step 4: Power DVR
Just connect your DVR to the power supply-input which is on the DVR. After it’s done, you can then connect the power supply for DVR, monitor and camera to the main power supply.
Things to consider;
– All CCTV recording are stored inside a DVR thus it’s vital to keep your DVR inside a safe and locked compartment such that if
an intruder happens to spot it then they will be unable to destroy the recorded videos.
– This is the most crucial step when it comes to CCTV installation, it ensure a secured security system for your office or home.
– It’s important to safe-guard your CCTV’s DVR since it’s the place where your surveillance hard disk is stored.
Step 5: Connect your Monitor to the DVR
You can use a BNC-BNC, Scart lead or even a VGA lead to connect your monitor to the DVR. However, for those using a TFT monitor, it’s important to refer to your manufacturers’ connection instructions.
Things to consider;
To connect your monitor to the DVR, you’ll have to use a video cable to connect through a BNC port. However, when connecting your BNC port, There are certain things you should consider. First, you’ll have to;
– Remove an outer covering of your video cable of about 1.5 cm to expose the braids.
– Slide the crimping barrel towards the cable as its wider diameter facing the cable’s end. Thereafter, you should remove the
white insulator that’s covering the innermost cable.
– Insert the exposed cables into your BNC port as you screw the crimping barrel to ensure a secure connection.
– You can then connect your DVR-output port to the screen or monitor to video feed.
Step 6: Program your DVR
This is the final stage when installing a CCTV. Based on the instruction manual, continue with programming your DVR. Some manual may ask for hard drive installation while some have it already done and you’ll be ready to-go. Often, you’ll find instructions on the DVR available on the CD or the booklet provided after purchase.
Things to consider;
– Before you start programming your DVR, you have to first, power on your cameras which will then be followed by the display and
lastly the DVR.
– Setup your DVR based on the provided user manual with the DVR.
– To confirm if each camera is properly working and it’s providing the required viewing angle, it’s important to go over on
each and every camera’s feed.
Verdict
If you follow these easy and simple 6 steps explained above, then installing a CCTV can be an easy task for you. No need to
hire a professional. These steps are explained in details with things you should consider as you setup your CCTV. However, it’s essential to safeguard your DVR at all times since its where all the footage or videos are stored.
In addition, a right spot or location and sufficient lighting for your CCTV’s cameras is essential, this is to ensure high quality
images is produced. A DVR should be stored in a safe, secure and locked place to avoid cases of intruders damaging the videos. Therefore, after installation your CCTV camera successfully, you can consider your office or home a safe haven since everything is capture and who wants to be caught? It’s essential to purchase a quality CCTV unit to help capture high quality images as well.